11.30.2011

Easy Crusty Bread

I love bread. Pretty much all kinds. 
But the best kind.... 

...is crunchy and crusty on the outside and moist and tender on the inside. 

This is probably the easiest recipe that gets those results that I have made in a long time. The original recipe uses a dutch oven or any sort of covered dish; I don't have one, so I used a cast iron pan. Whatever you use, make sure it has a thick bottom to prevent burning. I know it looks like a lot of instructions, but there really aren't that many steps. I added some things that I did, and things that may help you. I'd suggest reading through it once first, just so you know where you are heading. I want to make it again, but this time add spices or herbs or cheese or something... If you experiment with it and have any success, comment and let me know! 

Ingredients:
- 1 1/2 cups warm water
- 1/4 teaspoon yeast
- 1/2 teaspoon salt
- 3 cups flour, plus some for dusting
- Corn meal for dusting

1. Mix water and yeast till yeast is dissolved. Add flour and salt and stir till dough looks shredded and kind of sticky. Cover with plastic wrap and let it rest for at least 8 hours, preferably 10-12. Go to work. Or bed, whichever time frame you'd like. 
2. There should be lots of bubbles when you return, and it should smell a bit fermented. Scrape the dough into a ball and turn onto a floured surface. Fold it over a few times (don't work it too much) and let sit for another 15 minutes. 
3. Gently shape it into a ball. I do this by pulling all the edges into a little clump; flip it over so that that seam is down on a non-floured surface, and then use your open/cupped hands to turn it in a circle. If it sticks right, the circular motion will pull the dough together and "screw" it into a nice round loaf. Generously dust a clean dish towel with cornmeal, and place the dough there seam-side down. Dust the top with a bit more cornmeal and let rise for 2 hours. It should have doubled in size
4. 20 minutes before the dough is ready, pre-heat the oven to 475*. I know, it sounds really hot, but no, it's not a typo. Place your dutch oven/ceramic dish/cast iron pan in the oven. 
(I do not own a dutch oven, so I improvised with a cast iron pan and a make-shift tin foil cage which worked GREAT. Just be careful that you crinkle the foil edges together to seal off as much as you can, and that when you are assembling the cage on a hot pan, you are careful not to burn yourself.)
5. When the dough is ready, pull out your pan and turn the dough seam side up into it. Shake it a bit if it gets too disfigured. Cover with a lid (or enclose it in a tin foil cage), and bake for 25-30 minutes. Remove lid/tin foil and bake for another 15-20 minutes, till brown. Let it cool before slicing. 

I found this recipe here: there is an interesting article about this method of baking bread, and the ideas behind it. Enjoy!


11.27.2011

Best Snack Ever

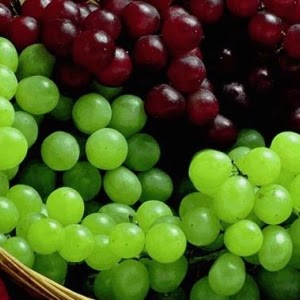
I was introduced to these by my fiance, and I have to admit that I laughed at him at first. But, like most things, he was right and I was wrong. They are little drops of wonder and delight and are the BEST healthy way to satisfy any sweet tooth cravings. What are they?


Frozen grapes.

                       Green grapes

                                Red grapes

                                        Purple grapes

                                                Concord grapes

Any grapes.


Wash them and pluck them from the stem; dry them off, and throw into a gallon freezer bag. Pull out a handful when you have those late night ice cream cravings and pop them in your mouth. They are the perfect soft frozen-y texture and need barely any time to thaw. Yes, they still have sugar, but these natural sugars are so much better for you than anything that starts with Haagen or ends with Dazs. Guaranteed.

I've also avoided buying grapes thus far because as a single person, I always find that I could never finish off a big two pound bag before they went bad. This also effectively removes that problem without losing any of grapes nutritional value (ie Vitamin C, vitamin K, potassium, calcium, antioxidants, etc).


11.15.2011

Grilled Chicken Salad


This is another fallback favorite for dinner that's really easy to prep and super inexpensive and about a hundred times cheaper than buying a salad like it in a restaurant. Some ideas of what to use are as follows: salad greens/spinach, cherry tomatoes, green peppers, cucumbers, carrots, parmesan cheese, and marinated grilled chicken. 


Wash and cut the veggies, grill and slice the chicken, drizzle a little of your favorite vinaigrette on the top and enjoy!


11.07.2011

Lemon Ginger Shortbread Squares


A wonderful side to a cup of dark roast french-ly pressed coffee or tea. Unlike most other baked goods I make, I actually prefer these after they are cooled. They hold up well and last pretty much forever, if they don't get eaten that is.

Ingredients:
- 1 cup (2 sticks) butter
- 1/2 cup sugar
- 1/4 teaspoon salt
- 2-3 teaspoons lemon zest
- 2 teaspoons vanilla
- A couple drops of lemon extract
- 1/4 teaspoon ginger (more if you want a stronger flavor)
- 2 cups flour

1. Beat together the first four ingredients till smooth and fluffy.
2. Add vanilla, lemon extract, and ginger and combine.
3. Slowly add flour, and mix till just combined. It will probably be crumbly.
4. Press dough together with your hand inside the bowl until it is united enough to put out on a flat surface. Press into a rectangle and refrigerate for 1-2 hours.
5. About 20 minutes before dough is ready, preheat oven to 325*. Once dough is chilled, roll out into a rectangle about 1/4 inch thick. Sprinkle with sugar and cut into squares or circles or stars or diamonds or whatever suits your fancy.
6. Bake for 20-22 minutes, till edges are slightly brown. These got a little darker than I would have preferred. Watch them carefully, since once they start browning, they brown FAST. Let cool on the baking trays for 3 minutes before transferring to cooling racks. Store in an airtight container.

Contributors