4.29.2011

An Evening At Home

 El Dorado on Audiobook   /   Ice Cream   /   Pu Er Tea
Cookies and Cream Ice Cream with a homemade raspberry/peach/strawberry sauce
 The tools to make tea the right way
 
 Place dry loose tea leaves in little cup. Fill with boiling water, and use the tea made from that first pouring to rinse the teapot and cup and strainer. After discarding the first pouring, fill with water again, cover, and let steep for a few minutes.
 Use the lid to keep the tea leaves in, and pour through the strainer into the teapot. Most chinese tea's can stand up to 10-12 pourings before becoming too weak. 
Enjoy! 

4.27.2011

Crepes

The more I cook, the more I realize that simple food is amazing. Having few ingredients allow you to actually taste and enjoy those ingredients individually; I feel like palate over-stimulation is sometimes just as much of a danger as sensory over-stimulation of our current entertainment industry (okay, maybe not nearly as bad, but you get my point).
Anyways. Here is a quick and easy recipe from Tyler's family:

Batter Up:
- 4 eggs
- 1 and 1/4 cup milk
- 2 tablespoons olive oil
- 1 cup flour (half wheat/half white if you feel healthy)
- 1/2 teaspoon salt

Mix:
Beat eggs together then add milk. Add the rest of the ingredients and whisk until smooth.
Grease a frying pan with butter, and heat it over medium heat until a drop of water dances.
Pour 1/4-1/2 cup batter into the pan, and tilt the pan till the batter is evenly (thinly) spread.
Flip when center is dry, and/or the first side is browned.

Serve:
Roll up with fruit, applesauce, powdered sugar and lemon juice, sauted spinach and bacon, whatever fits your fancy.
Yesterday I heated up about a cup of frozen peaches and a cup of frozen raspberries with about two tablespoons of honey till they formed a nice sauce. It was wonderful.

(Photo credit: somewhere online) 

4.25.2011

Challah Bread

"Man cannot live by bread alone." The fact that Jesus said that makes me think that maybe, just maybe, it actually is possible to physically survive on bread and water. That would be very good news to my carb-hungry appetite! But it's easy to fall into the belief that having a "healthy" life is one where you work out consistently, eat wholesome food, and get the sleep and rest that you need. It's much easier to neglect our social, mental, emotional, and spiritual well-being, especially when taking care of our bodies (making money for food, cleaning the house to stay clean and healthy, running or going to the gym) takes up most of our free time anyway. But Jesus went on to say that we cannot possibly survive from just bread, but rather "by every word that comes from the mouth of God.” What does that even mean? I'd encourage you to do some digging and find out. How can someone live on words? Do words really have any significance anyway? 

How do God's words make us truly live?  


Now to some bread making, since man can live by eating some bread as a part of a full and healthy balanced diet.

Ingredients:
- 1/3 cup honey
- 1 1/2 warm water
- 1 package yeast
- 1 1/2 teaspoons salt
- 2/3 cup olive oil
- 2 eggs
- 6-9 cups of flour, as needed
Glaze:
- 1/4 cup milk
- 2 tablespoons olive oil
- 1 egg white
- 1 tablespoon sugar

Mix:
Dissolve the honey and the water in a large mixing bowl. Sprinkle the yeast on top, and let sit for about ten minutes, or until a foamy/creamy layer forms on top. Gently stir in the salt, olive oil, and eggs (beaten). Begin mixing in the flour one or two cups at a time with a wooden spoon. Add flour until it is still tacky, but not wet; it should be a consistency that you can knead with your hands.
Turn out onto a floured surface and knead until smooth and bounces slightly back.
Place in an oiled bowl and let rise in a warm area until doubled, for about 70-90 minutes.
Gently deflate the dough and turn out onto counter top again. Divide into two pieces, and cut the first half into four pieces.
Roll each piece into a 14-inch rope, beginning in the middle and stretching it outwards. Keep the center of the rope slightly larger than the ends. 
To braid, pinch the tops of the strands together and give yourself plenty of space to work. Make an "under-2, over-1 braid," by taking the left-most rope, and move it to the right to cross underneath the next 2 ropes, then move it left to cross back over the strand immediately to its left. Take the far right strand, and move it to the left and cross it under the two strands to its left (they are already crossed from the previous braid); then move it right to cross back over the strand immediately to its right. Repeat until the 4 strands are braided together all the way to the end, and pinch the ends tightly together and fold slightly under. 
Repeat the steps to braid the second loaf, and let the braided loaves rise for 1 hour.
Preheat the oven to 350* and line two baking sheets with parchment paper. 
Whisk together the glaze ingredients, brush the braided loaves with the glaze to make a shiny crust, and bake the loaves on the prepared baking sheets in the preheated oven until they are light golden brown, about 30 minutes.
Share by breaking bread together. Tearing pieces off by hand is highly recommended.

I'm Back!

My apologies for being absent this past week! I was out of the state for a good bit with no internet access, then came back to help a dear friend prepare for her wedding. I think I spent more time in my car than I did in my own house, so needless to say, not much cooking went on. But hopefully this next week will be much more normal. Hope you all had a wonderful Easter weekend!

4.15.2011

Triple Chocolate Chip Oatmeal Cookies


I think the pictures can speak for themselves, so I'll cut to the chaste.

Ingredients:
- 3/4 cup unsalted butter
- 1/2 cup sugar
- 1/2 cup pure maple syrup
- 2 eggs
- 1 teaspoon vanilla
- 1 3/4 all-purpose flour
- 1 teaspoon baking soda
- 1/2 teaspoon cinnamon
- 1/2 teaspoon salt
- 2 3/4 cup rolled oats
- 1/2 cup EACH white chocolate chips/semi sweet chips/chocolate chunks


Create:
Preheat oven to 375*.
Cream together butter, sugar, and maple syrup.
Beat in eggs one at a time, then add vanilla and mix.
Stir together flour, soda, cinnamon, salt, and oats. Add and mix on a low mixer speed into butter.
Add chocolate chips and mix together thoroughly.
Drop by teaspoons, or use one of these again.
Bake for 8-9 minutes or until golden brown, but still soft in the middle. I usually let them sit and cool on the cookie tray for a couple minutes to let them set before putting them on cooling trays.
Eat and be merry.

4.14.2011

Steak Fried Rice


Today's lesson is all about re-using and recycling. If you are an ardent follower of my blog (all three of you!), you will recall steak from Monday and asparagus from yesterday. Below is one of the easiest ways to spruce up old leftovers and make it into something gourmet and wonderful. 
I'm not going to give you measurements, but rather stick to broad and basic principles, and general ideas which will hopefully inspire you to create your own goodness as well. 

We'll start with three principles:
1. Fried rice is tasty.
2. Fried rice can be made with just about anything.
3. Seek simplicity. One meat and one veggie usually does the trick.

Now let's get into what happened to create that.
<-----

First of all, I put about a cup of uncooked rice on the stove to cook. If you don't know how to cook rice, there should be instructions on the bag you bought it in.

Secondly, I sliced the leftover steak in long pieces, then crosswise to get small chunks. Then I took 5 asparagus stems, cut about an inch off the bottom (threw that part away), sliced them down the center, then into about 3/4 inch-long pieces. Saute the steak and asparagus in about a tablespoon of oil with a shy tablespoon of crushed/minced garlic in a large frying pan. I added about a 1/4 cup of the Dipping Sauce from my spring roll recipe after a while (but you don't have to; salt, pepper, and sesame oil work great too), and keep it covered till the asparagus is tender and the steak is warmed through. Once the rice is done, add to the frying pan and mix together with the beef and veggie. Fry on high for a couple minutes, stirring constantly. Remove from heat. Serve with a dash of soy sauce.


And drink more water! It's good for you. I am realizing that I really don't drink as much as I should, and you probably don't either. Our body is made up of 60%-75% water and it is in charge of all sorts of good things in our bodies, like transporting oxygen to our organs, removing waste, and protects our joints and organs. Without water our bodies (while still having the technical ability to function) cannot do it's job of maintaining health. We need the means of transport and the life of moisture that water brings in order for all our organs and joints and muscles to do their job well.
Go forth and be hydrated!

4.13.2011

Asparagus-Parmesan Cheese Puffs

I found the recipe for these little guys on the Williams-Sonoma website. I had no clue that they posted recipes, but apparently they do! I love asparagus and I love cheese, so I figured they couldn't go wrong. 


Ingredients: 
- 1 1/2 cups crosswise-diagonally-sliced asparagus spears (about 1/8 inch long)
- 3/4 cup milk
- 4 tablespoons (1/2 stick) butter
- 3/4 cup flour
- 1/2 teaspoon salt
- 1/4 to 1/2 teaspoon cayenne pepper
- 3 eggs
- 3/4 cup shredded Gruyère cheese
- 1/2 cup grated Parmesan cheese


Puffify:
Preheat oven to 400*. Fill a pan with about 3/4 inch of water and a teaspoon of salt and bring it to a boil. Add the asparagus and simmer for about a minute, until tender. Drain and set aside, being careful to not overcook them to mush.
In a saucepan, mix the milk and butter together over medium heat.
Sift together flour, salt, and cayenne pepper in a small bowl.
Remove milk from heat, and add flour mixture. Beat with a wooden spoon about 1 minute. The texture will look really funky, but it should thicken and pull away from the sides of the pan.
Transfer to a bowl, and add eggs one at a time, beating with a fork after each addition. This will continue to look really funky. Let it sit and cool for at least 5 minutes.
Add the asparagus and cheeses to the dough and mix well. Use a teaspoon or a teaspoon scoop to place small dollups about 1 inch apart on a cookie tray.
Bake for 20-25 minutes, till puffy and golden brown. Serve immediately.

4.12.2011

Rustic Olive and Red Pepper Bread

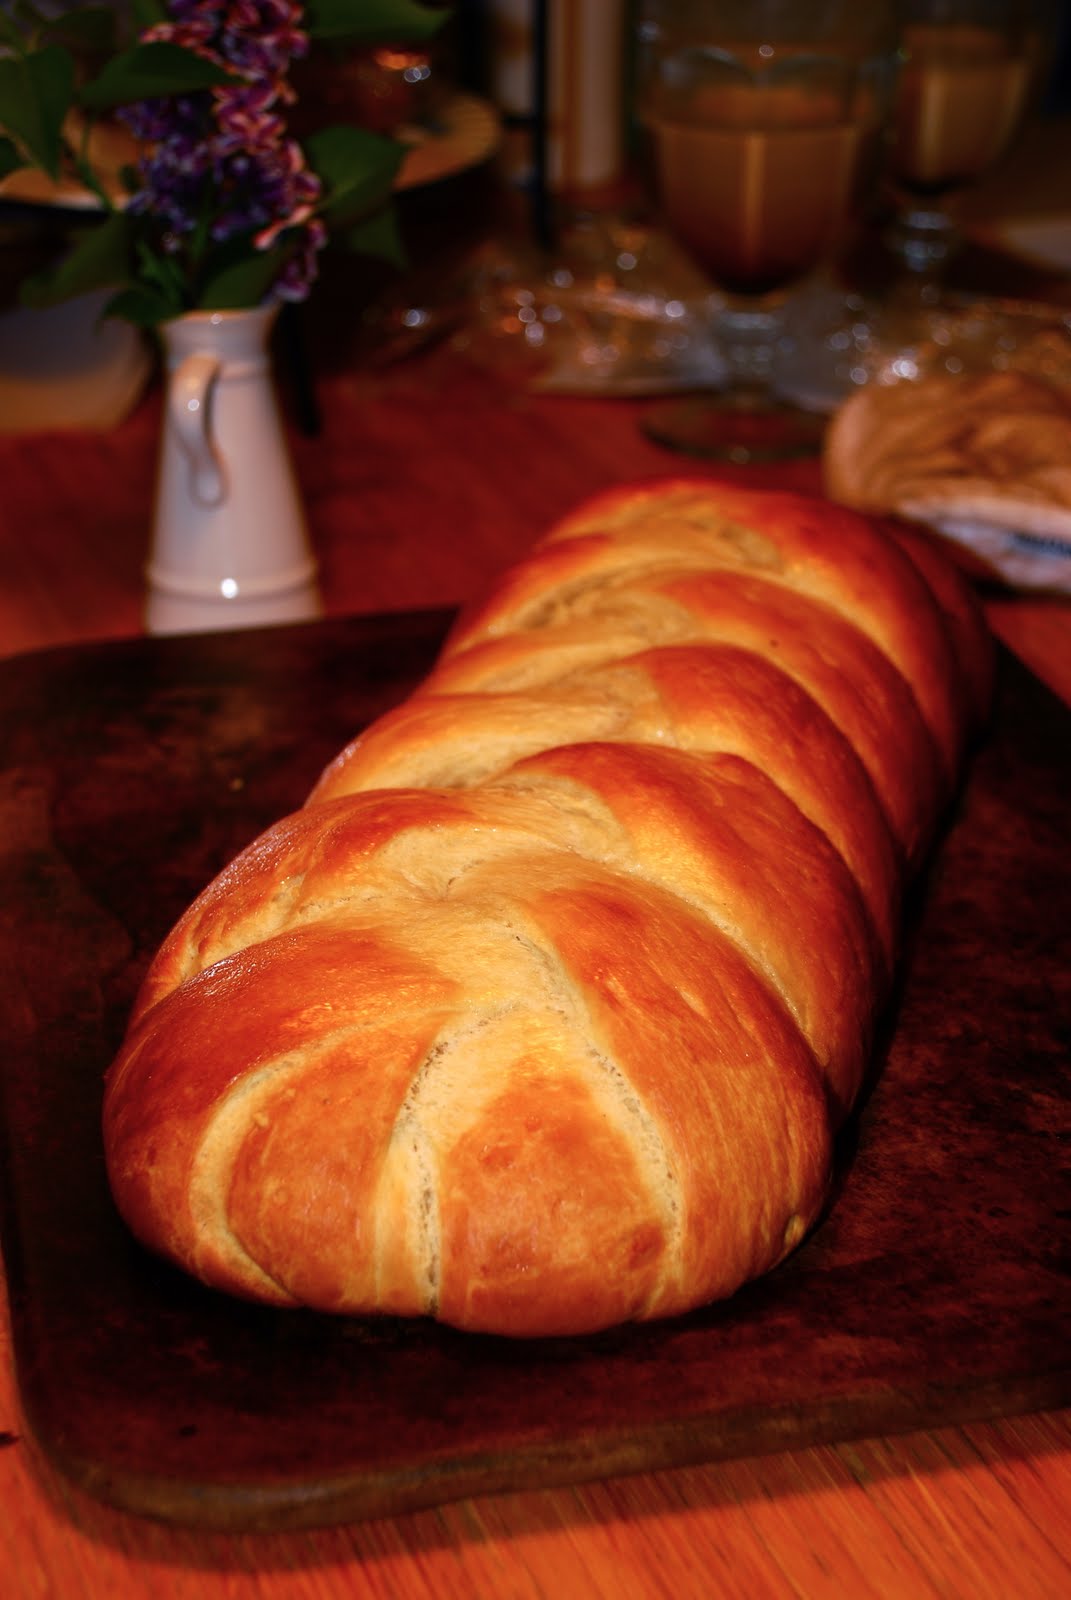
So finally here is the promised Olive and Red Pepper bread recipe. It is taken directly from a cookbook that was given to me for my birthday called Amy's Bread. It has wonderfully detailed recipes and if you have never made bread much before, this is a great resource because it walks you through quite literally step by step through the whole bread baking process. It also produces the kind of bread that you see in restaurants and specialty bakeries.
Something that you should know up front is that it is typically a two-day project to make this bread. There is a starter (called "poolish") that needs to be made the night before, and then used the next morning. After that is ready, making the bread takes several additional hours because it has to rise several times before it's ready to bake. I often do this either on a Friday or Saturday night:
8:00 pm - Make poolish and get it in the fridge by 9:15pm
10:00 am - Pull it out to warm up, right before church if on Sun. 
1:00 pm or so - Poolish is ready; start the bread.
5 hours later - Bread should be ready (Obviously you'll have time to do other stuff in between while the bread is rising).

You will also need: 
- H20 spray bottle
- Old cast iron pan (maybe something that you pick up at a garage sale or thrift store?)
This process (which is also explained below in the recipe) will give you a WONDERFUL crispy crust that often distinguishes specialty breads from homemade breads. You don't have to do this if you don't want to, but I guarantee that it will make a big difference in the final product. 

So with that, let's get started.

We start with the starter, the Poolish:
Ingredients:
- 1/4 cup very warm water (105*-115*) 
- 1/4 teaspoon dry active yeast
- 3/4 cup cool water (75*-78*)
- 1 1/2 cups + 2 tblsp flour

Combine warm water and yeast in a medium sized bowl and whisk until yeast is dissolved. Let stand for 3 minutes. Add the cool water and flour and stir vigorously for 1 minute, till it is smooth and elastic. 
Scrape down the sides of the bowl and cover with plastic wrap. Make sure you have room in the bowl for it to triple in volume. 
Let it rise at room temperature for 6-8 hours, OR 1 hour and then place in refrigerator overnight. 
Remove it from the fridge 3-4 hours before use, so it can warm up and become active again. 
Use it within the next 2-4 hours, before it begins to deflate and die.  

Bread:
Ingredients
- 1/4 cup very warm water (105*-115*)
- 3/4 teaspoon yeast
- 1 3/4 cup Poolish
- 1 cup cool water (75*-78*) (If your dough is still cool from being refrigerated, use warm water instead)
- 3 1/4 cup all-purpose flour
- 1 tablespoon course salt (less if you are using smaller grains)
- 1 large red bell pepper
- 1 cup drained and roughly chopped olives (I use fancy green/black/red ones, not the normal canned black olives)
- Cornmeal for sprinkling

Combine the very warm water and yeast in a large bowl, and stir with a fork to dissolve the yeast. Let stand for 3 minutes. 
Add the poolish and cool/warm water and mix with fingers for two minutes. It should look milky and slightly foamy. 
Add flour and salt, and mix with your fingers to incorporate the flour. Scrap the sides of the bowl and fold it over itself several times until it gathers itself into a mass. It'll be realllly sticky, with most of it sticking to your fingers. 
Dump it out onto a floured surface and knead for about 7 minutes. Use as little extra flour as possible, and the dough should end up smooth, suple, elastic, and slightly firm. 
Place dough back into the bowl, cover with oiled plastic wrap, and let sit for 20 minutes in warm/room temperature. 

Meanwhile, drain and chop the olives if you haven't already. Cut the red pepper in half and remove the center/seeds. Slice into very very thin slices. If they are too big, the moisture from the pepper flesh will expand in the bread and create air pockets. 

Spread the olives and pepper on top of the dough in the bowl, and fold over several times or knead for about two minutes to mostly incorporate it all into the dough. It may not be completely mixed in, but do as much as you can. Pull the dough out, grease the bowl, place the dough back in the bowl, and cover and let rise again for 1 hour. 

Gently deflate the dough in the center; fold each side into the middle, then fold it in half the other way, pat it gently, and turn it over on it's seam to rise again in a warm place for another 1 1/2 hours or until doubled in volume. 

Gently dump the dough onto a well-floured surface and spread into a big rectangle. Fold over each side and press together to make sure that the olives and pepper are evenly distributed (the dough will still be pretty sticky). Divide into three equal parts, for three loaves. Gently press out all the large air bubbles, and form into an oval with slightly tapered ends. 
If you are using a baking stone that is already heating up in the oven, generously sprinkle a peel with cornmeal for the loaf to rise on (seam-side down). If you are baking on normal baking pans, line with parchment paper, sprinkle with cornmeal, and place loaf seam-side down on it to rise. 
Spread a small layer of flour on top of the loaves, cover with oiled plastic wrap, and let rise for 1 1/4 to 1 3/4 hours or until almost doubled. 

 Thirty minutes before baking, preheat the oven to 450*. Place an old cast iron pan or skillet in the oven on a bottom rack, and if you are using a baking stone, place that in the oven now as well. 

Ten minutes before the bread is ready to bake, place two or three ice cubes in the cast iron pan to create moisture in the oven prior to baking. Also, place about 1 1/2 cups of water in a tea kettle to boil.

Use a very sharp knife or razor to score a long but shallow line from end to end on top of each loaf, then open the oven door to either 1) gently slide the loaves off the peel onto the baking stone or 2) place the baking sheets in the oven. Quickly mist the loaves with the H20 spray bottle, about  8-10 misty squirts. Then, pour 1 cup of boiling water into the cast iron pan below, and shut the oven door immediately. 
After about 1 minute, mist the loaves again, and also shut the oven door immediately. 
Be CAREFUL to not burn yourself on the steam, or on the oven itself for that matter. 

Bake for 15 minutes, then reduce the oven temperature to 400* and rotate the loaves from one shelf to the other. Bake for 12-18 minutes longer, until the loaves sound hollow when tapped on the bottom. 

Move to cooling racks, and cool for at least half an hour before serving (These can get sticky if cut too soon). Enjoy!

4.11.2011

Simple Steak

So this week I'm going to try to be good and stick with lots of proteins and vegetables and breads, not sugars (I think).


I'm off to a good start, since I made this this weekend: --->

Well, this is what it looked like beforehand.

I firmly believe that the best steak is the kind where you can actually taste steak, not a ton of flavorings and tenderizers and sugar and whatnot. This was a very simple dry rub that I let it sit in overnight:

- Equal amounts of course salt and roughly ground pepper.
- Dash of chili powder
- Some dried garlic/onions
Mix it all together then apply generously to the beef. Cover with plastic wrap and let it sit overnight.


When it's time to grill, take the beef out and let it come to room temperature before you actually grill it. This will help it cook more evenly and a bit quicker.
I left the actual grilling to my wonderful boyfriend, and made french press coffee instead. If you don't know how to grill steak, you can visit How To Grill Steak for some tips.
I also boiled some fresh sweet corn, and steamed some broccoli florets in the meantime.

Simple dinners are winners. 

4.08.2011

Ghirardelli Chocolate Truffle Cake

Warning: close your eyes, close your browser, shut your computer, and do not read further if you are looking for something low-calorie or low-fat. I know I promised that I'd try to do more healthy stuff this week, but for some reason, it's just not happening.
This is one of the easiest fancy-ish desserts that I have ever made, and it only has four ingredients. Like my pedagogy professor alway said, Concision is King.

Ingredients:
Cake:
- 3 cups Ghirardelli Semi-Sweet chocolate chips
- 1 cup (2 sticks) unsalted butter
- 7 eggs, chilled
- 1/4 teaspoon salt
Ganache:
- 1/2 cup heavy cream
- 1 cup white or milk chocolate chips

Preheat the oven to 325* with a rack in the center of the oven. Grease the bottom and sides of a 9 inch round cake pan and line the bottom with parchment paper.
Melt the semi-sweet chocolate chips and butter in a double boiler (or glass bowl set on top of a pot of simmering water) until all smooth and melty. Remove from heat.
Whip eggs and salt with an electric mixer about five minutes. Gently fold eggs into melted chocolate mixture, a third at a time. It'll take a little bit to be incorporated, but just keep gently folding till it's consistent.
Gently pour into prepared cake pan.
Prepare a water bath by putting the cake pan in a larger pan, and fill the large pan with hot water (from the tap) until it reaches halfway up the side of the smaller cake pan. This will prevent the cake from burning, and will cook it more evenly. (I usually do all that on the counter, then take out the small pan and set aside, place the pan of water in the oven first, then put the smaller pan back in the water bath once it's settled in the oven. Reverse the process for pulling it out when it's done. YOU too can prevent oven swamps!)
Bake for about 40 minutes, or until the sides of the cake pull away from the pan, and it is set in the center. Remove from the water bath, and cool completely.
Cover with plastic wrap, and refrigerate.
To extract the cake, dip the pan in warm water to loosen the cake from the sides of the pan, and run a small knife or spatula along the sides as well. Flip it over onto the plate you intend to serve it on and peel off the parchment paper.


To make the ganache, bring the cream to a simmer; pour over chocolate chips, and stir/whisk till completely melted and creamy. If you want it to be thicker, let it sit and cool for a bit. If you want it soupier so it spread out more, use it right away. Pour over cake and spread evenly with a spatula.Decorate with raspberries or blackberries and chill till ganache sets. I used about half of some white chocolate ganche and half of some milk chocolate and kinda swirled and mixed it together in these pictures. There's no rule about switching things up every now and then... Serve chilled, and remember small slices go a long way.

4.07.2011

Roasted Almonds

To stay on the snacky trend of yesterday, here is a great and versatile recipe for a healthy alternative to reaching for yucky msg-ified doritos or greasy potato chips when the snack monster attacks. You can literally make these in so many different ways that will satisfy the most ruthless snack attack if you want something sweet or salty or spicy or whatever you feel like.

Ingredients
Base:
- 1 large egg white
- 2 tablespoons melted butter, cooled
- 4 cups whole raw almonds
Flavoring options:
- 1/2 cup sugar + 1/3 cup brown sugar + 2 tsp cinnamon + dash of nutmeg + 1 tsp salt
- 1/2 cup sugar + 1 teaspoon cayenne pepper + 2 teaspoons salt 
- A packed 1/3 cup finely chopped fresh basil + 1/2 cup Parmesan cheese + 1 Tbls garlic salt
- Be creative! Make your own! And share the joy if you create something the rest of us didn't even know we couldn't live without. 

Preheat oven to 250* and lightly grease a large flat 1-inch pan/cooking sheet, or any cooking sheet that has a bit of an edge.
Beat the egg white lightly with a fork, add the cooled melted butter and beat till frothy but not whipped stiff.
Add the almonds and mix till evenly coated.
Mix whatever flavoring mixture you wish to try together in a small bowl, then sprinkle over the nuts and toss to coat.
Spread evenly on the baking pan one layer deep (if they are on top of each other, they won't get nice and crispy, and they may stick together), and bake for 1 hour or until golden and the coating is mostly dry. Stir occasionally (every 15-20 minutes or so?).

Cool on parchment paper; you can cool it in the pan, but make sure you also stir occasionally during the cooling process, or they will all stick pretty bad to the pan (especially the sugary kinds). And so you're not afraid that you didn't cook them enough, they won't taste completely crispy until they are completely cooled.
Eat and be healthy, both body and soul!

4.06.2011

Muddy Buddies

As a kid, we weren't normally allowed to eat any sugar or dairy. The only time we could was when my mom liked something so much herself that she couldn't resist making it. So when my mom finally found something that was her kryptonite, Kenny and I were not complaining in the very least. It's another easy recipe, and I haven't really found anyone who doesn't like it. I've also heard some people call it Puppy Chow too cause I guess it looks like dog food.

Ingredients:
- 1 box (9-10 cups) of Chex Cereal (corn, rice, wheat or a mix)
- 1 heaping cup of dark chocolate chips
- 1/2 cup creamy peanut butter
- 1/4 cup butter (NO margarine or fake stuff)
- 1 teaspoon vanilla OR 1/2 teaspoon almond extract
- 2 cups powdered sugar
- Large/2-gallon ziplock bag

Mix:
Pour cereal into a big mixing bowl and set aside.
Melt everything else EXCEPT powdered sugar over low heat in a saucepan till smooth. Remove from heat and add vanilla or almond extract.
Pour over cereal and mix till evenly covered.
Pour into zip-lock bag and dump the powdered sugar in. Seal the bag with plenty of air still inside to keep the bag puffed up, and shake around till everything is evenly dusted in the powdery white goodness.
Lay out on a cooking tray to cool. Store in an airtight container or zip-lock bag if there is any left over.

EDIT: So I was thinking that somehow adding coffee or espresso to these would make them absolutely divine, but I am not somewhere where I can actually try it. If any of you are feeling inspired and try something that works, I'd love to hear about it in any comment below!!

PS I apologize for the false advertising yesterday. I promise I WILL get the Rustic Olive and Red Pepper Bread posted soon; it's not a recipe I know off the top of my head, and I didn't have a chance to find the recipe book. So with no further excuses, I promise I'll get it up soon!

4.05.2011

Coming Soon: Rustic Olive and Red Pepper Bread

They say that being on the ball is a good thing, but I've always thought that being behind a rolling ball seemed safer than on top or in front.

Maybe I've just had too many wipeouts with one of these ----------->


Regardless, my apologies... Yesterday was pretty busy and I didn't quite have time to get something together for this morning. I'll do my best to get one of the best bread recipes I know of up sometime tonight.
Happy Tuesday!

4.04.2011

Lemon-Aid Tea

I'd like to think that my approach to Mondays are completely sanctified and I don't have any trouble accepting that "this is the day that the Lord hath made, I will rejoice and be GLAD in it." But unfortunately, there is almost always a war between my flesh and my spirit, and I often forget all the amazing things that I should be thankful for. Like not being sick.

I work on a college campus where sickness comes in waves, almost like epidemics. The long hours, lack of sleep, unhealthy eating habits, on top of close quarters with those who are sick, often breed colds and flus like a greenhouse for...anything green. But my mother taught me well when it came to beating a bad cold: lots of liquids, no sugar/dairy/bad fatty stuff, and her special tea, and I think I only succumbed to sickness once or twice in four years of college.
Since it's in all of our best interests that all of you stay healthy too (esp with finals coming up for all you current students!), here is the simple concoction that saved me many times.

What you need:
- A big mug/16 oz travel mug
- 2 tablespoons FRESH squeezed lemon juice
- 2 tablespoons honey
- 1 ginger tea bag
- 1 chunk of fresh ginger, peeled (optional)
- Boiling water

Mix everything together in the mug and let steep for about 3 minutes. You can change up the lemon-honey ratio to taste; some like it sweeter, some like it tart. You can leave the ginger root in there longer for a stronger taste, or pull it out sooner if it's too much. You can also use other types of tea if you don't have ginger tea, but ginger seems to work the best for me.


I'm also going to be a stickler about using fresh lemon juice. Or you can get MinuteMaid's frozen lemon juice concentrate that doesn't have any of the preservatives in it. But I would stay away from anything that has anything but lemon juice in it. CHECK THE INGREDIENTS LIST because many times, the label says 100% juice! and it actually has stuff like sodium benzoate and other yucky preservatives.
 Stick with the Form of lemon juice, my friends, and you shall be blessed.

This may by the outward form of a lemon, but it is not the Form of lemon juice. Never sacrifice quality for convenience.

4.01.2011

Key Lime Pie

I love limes. I never use them as much as I would like, but the tangy sweet smell when you cut one open always makes me feel like I'm at the beach, in a field of wildflowers in the spring, on a glacier mountain top, and in a house with a white picket fence all at the same time. It smells like clear blue sky.

A couple drops of lime juice in a cup of ice cold water is the best, and is really good for you. It has a crazy amount of vitamin C, as well as omega 3 and 6 fatty acids. It's the good stuff.
  
Since adding a can of sweetened condensed milk kind of negates all those nutrients, and I can't always be completely healthy, I've decided to accept my fate and just deem this the soul-embiggening week. There's always time next week to write about healthy food. (Although I should get some credit because other recipes I looked at had TWO cans of sweetened condensed milk, and I dropped it down to one, with fluffy egg whites to make up for the loss in mass. I just saved you 1600 calories.)

Ingredients:
Crust:
- 1 bag 1 1/2-2 cups graham cracker crumbs (crushing them in the original bag makes it SO easy)
- 6 tablespoons melted butter
Pie:
- 3 eggs
- 1/2 cup lime/key lime juice
- 1 can sweetened condensed milk
- Pinch of salt
- Pinch of cream of tartar
Topping options:
- Sliced limes for decorating 
- Whipping cream for topping
- 1 cup sour cream + 2 tablespoons powdered sugar

Pie-ify: 
Preheat oven to 325*. Crush the graham crackers and mix with the melted butter. Use your fingers to press into a pie pan; it'll be a little crummy, but just do your best to make sure there aren't any holes and it is evenly distributed. 
Bake the crust for about 10-15 minutes, till slightly brown. 
Well, slightly more brown than moist graham crackers.

Separate two eggs, placing the egg whites in a small mixing bowl and set aside. 
Beat egg yolks with the third egg and add sweetened condensed milk and lime juice. 
Beat the egg whites, salt, and cream of tartar with an electric mixer till stiff peaks form. 
Fold the two mixtures together. 
Pour into crust, bake for 10-15 minutes until the middle is set (it doesn't jiggle too much). 
Pull it out to cool, then place in the freezer for several hours, or overnight. 
Decorate and serve with whipped cream and/or lime slices, or sour cream topping.  

Contributors