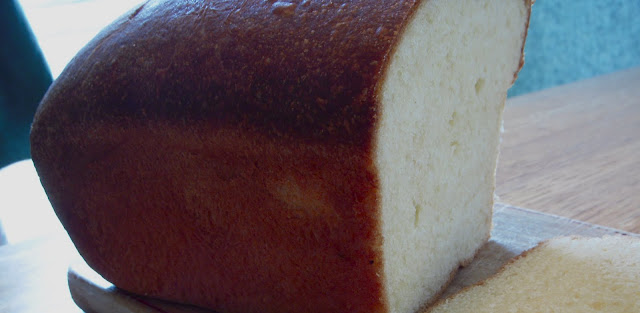
With no further ado, since I don't want to make you wait any longer than you have to...
Ingredients:
- 1/4 very warm water (105*-115*)
- 1 1/2 teasp. active dry yeast
- 4 cups bread flour
- 7 large cold eggs
- 1/3 cup sugar
- 2 1/2 teaspoons salt
- 1 1/4 cups cold butter
- 1/2 cup poolish ------------------------------------------------------->
Poolish
Ingredients:
- 1/4 cup very warm water (105*-115*)
- 1/8 teaspoon dry active yeast
- 1/4 cup + 2 Tbls cool water (75*-78*)
- 1 cups flour
Combine warm water and yeast in a medium sized bowl and whisk until yeast is dissolved. Let stand for 3 minutes. Add the cool water and flour and stir vigorously for 1 minute, till it is smooth and elastic.
Scrape down the sides of the bowl and cover with plastic wrap. Make sure you have room in the bowl for it to triple in volume.
Let it rise at room temperature for 6-8 hours, OR 1 hour and then place in refrigerator overnight.
Remove it from the fridge 3-4 hours before use, so it can warm up and become active again.
Use it within the next 2-4 hours, before it begins to deflate and die.
1. Combine the very warm water and yeast and stir to dissolve. Let sit for 3 minutes.
2. In a mixing bowl/bowl of a standup mixer using a dough hook, combine the yeast mixture, flour, cold eggs, poolish, sugar, and salt and mix on medium-low speed for three minutes. Increase speed to medium and mix for 2 more minutes till all the flour is moistened and gathered into a ball of dough. Add more flour as needed to pull it all together into a ball of dough. Mix for another 10 minutes, or until the dough sounds like it is slapping the sides of the bowl.
3. While the dough is mixing, take the butter from the fridge and put it in a ziplock back. Use a rolling pin to smash it into a big malleable mess. When the dough is ready, add the butter in 1 inch pieces. You don't have to wait for it to incorporate each time, and it may clump to one side, but just let it keep mixing and scrape it down as needed. Continue to mix for 8-10 minutes on high. The original recipe didn't talk about needing more flour, but I added some more at this step because it still seemed very wet. You may follow your gut =).
4. Put the dough in an oiled bowl, cover, and let rise for 1-2 hours, till it has doubled.
5. Refrigerate for 1/2 an hour so it's easier to handle. While the dough is cooling, oil the two loaf pans well.
6. Pour the dough onto a lightly floured surface. It will tend to "ooze" and spread out a bit (not keep it's form like normal dough) and that's okay. Divide it in half.
7. Press one half into a rectangle, with the short edge being about as long as your loaf pan. Fold the top edge down a third, fold the bottom edge up over on top (like a 3-fold business letter). Press along that top edge to seal it, then gently roll the edge underneath and shape it to fit into your loaf pan. Don't roll these guys too tight. Press the ends to seal the edges, and place into pan; use your knuckles to press down firmly along the length of the dough so it fills the pan evenly. Repeat with second loaf.
8. Cover the loaves with an oiled plastic wrap and let rise till they are getting close to the top of the pan. This is where you wait... probably 2-3 hours. Remove the plastic wrap.
9. Continue to let rise until they are about an inch above the tops of the pans. Maybe another hour.
10. Thirty minutes before you think they'll be ready to bake, preheat the oven to 375*. Place a smaller pan with about 2 cups of water in the oven as well, to create some moisture inside.
11. Bake the bread for 20 minutes, check and/or rotate, then bake for 15 more minutes. The loaves with be VERY dark, but that's what makes them realllly yummy. When the time is up, tip one loaf out of it's pan and tap the sides; if it sounds nice and firm and hollow, it's done. If the sides are still too soft, bake for another five minutes.
12. Remove them from the pans and let cool on a wire rack.
13. Enjoy!! This makes AMAZING french toast.

No comments:
Post a Comment